
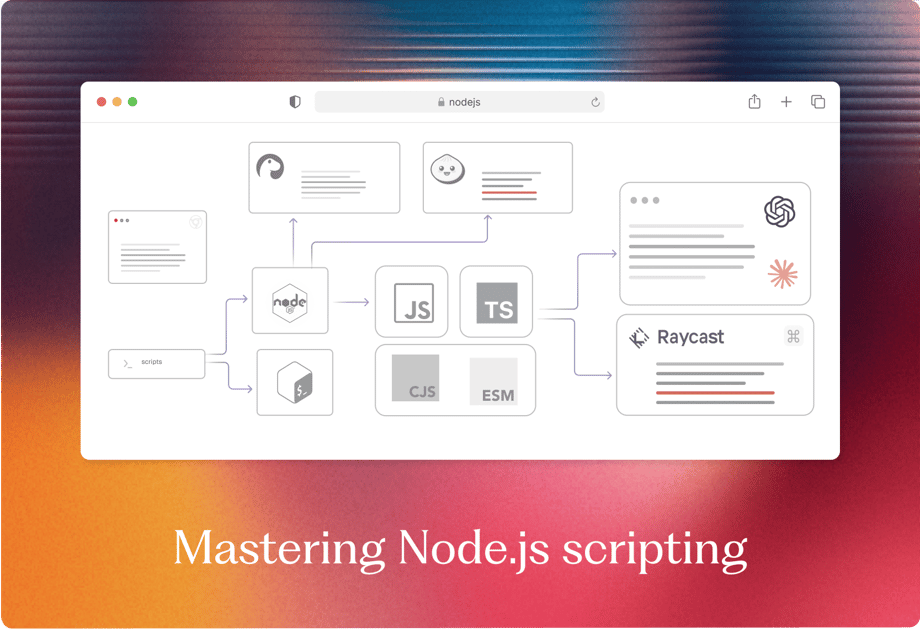
Scripting isn't about perfection — it's about saving time. It should be pragmatic, fast, and never something you get stuck on. Over the past 10 years, I went from barely seeing the point of scripting to writing quick scripts in minutes - scripts that save time, and that time stack up over the years.
In this article, I'll share how I got there. We'll start with the essentials - environment, language, and Node.js APIs - and finish with AI tools like LLM SDKs and CLIs. Think of it as an example of how to build your toolkit and mindset. Don't let choice paralyze you - just pick your tool. But to do that, you need to know what's in your arsenal.
Essentials
Before we start scripting, let's review the environments, languages, and engines we have so we can set up our toolkit - to reduce friction and make getting started easy.
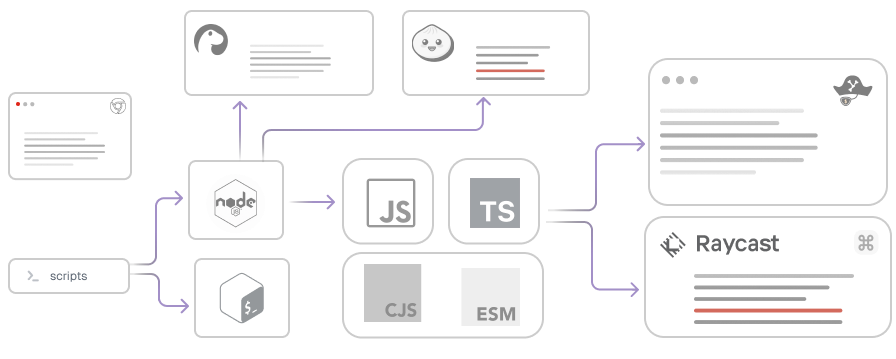
Environments
For our scripts, there are two execution environments:
Server(aka desktop/local) scripts – Node.js or Bash . These run on your machine, can read and write local files, make server-to-server network requests, interact with hardware, and so on.Browser scripts– run inside the browser sandbox and are limited to the Web APIs.
Sometimes these environments overlap: from a server script you might launch a full (Playwright/Cyprress etc.) or headless browser to carry out tasks that require a browser context.
Scripting
When we talk about scripting, we usually focus on a few core tools:
- Shell Scripting (
Bash,Zsh, etc.) – lets you run quick commands and automate simple system tasks. Javascriptor your primary language – pick what you know best or what fits the job. For me, that'sJavaScriptandTypescript, some of the task easier withPython, which works better for computer-vision, machine learning tasks.
With Shell scripts, you can probably do almost anything - even Doom! But using JavaScript makes logic, functions, and other tasks much easier, especially if it your primary language.
Javascript Runtime
Picking a JavaScript runtime, in short:
- Node.js - The veteran - npm everywhere, just works, but no built-in sandboxing and slower cold starts.
- Deno - secure by default with
--allow-*flags, ES module URLs, built-in TS support, but permissions can trip you up. - Bun - fast starts, npm-compatible imports, bundled bundler+test runner - yet still maturing
Which should you choose?
- Need strict security, typescript support out of the box? Deno.
- Want peak speed and tools out of the box? Bun.
- Want stability and widest support? Node.js. In my case default choice.
One thing to mention about Deno is that you:
- can import modules directly from a URL
- no
package.jsonrequired:
// on first run will be downloaded, on second will be cached
import { serve } from "https://deno.land/../http/server.ts";
So, it adds extra use cases in case we don't want to modify the project's package.json and make node_modules even larger.
Typescript
When talking about JavaScript, we should also mention using TypeScript for scripting.
Previously, we had to set up a bundler and configure a tsconfig.json,
but with Node.js 22 we now have experimental TypeScript support
via --experimental-strip-types flag (see https://nodejs.org/en/blog/release/v22.6.0).
node --experimental-strip-types ./script.tsAlthough it still has some limitations and issues - for example, it requires importing other modules with the .ts extension *(from 'file.ts',
so in some cases you'll still need to use ts-node.
For a quick, one-off script ("30 lines, single file"), plain JavaScript wins, just node script.mjs.
Once you have: multiple modules, 100+ lines, complex data shapes, or it will be long time with you, TypeScript's static types and IDE support pay off by catching errors early and easing refactors.
In short: JS for speed and simplicity, TS for safety and maintainability.
Modules Javascript
Node.js supports two main module types: CJS and ESM *(there are more, but these are the main ones)
- ES Modules (ESM):
import/exportsyntax — the modern approach. - CommonJS (CJS):
require()/module.exports— the original Node.js module system.
When possible, it's better to use ESM modules (details). So you have two main options how to enable ESM:
- Rename your files from
.jsto.mjs - OR Add
"type": "module"in yourpackage.json
One caveat of using .mjs or .ts (with --experimental-strip-types) is that you must include the file extension in imports:
// or './data.ts' for ts
import data from './data.mjs'
In most cases we choose .mjs so as not to affect the existing project setup—especially when there's no package.json.
Another benefit of mjs extension is top level
await
Essentials Toolkit.
Final Toolkit for server scripts look like that:
- Node.js (22+)
- Javascript with ESM (
.mjs)
Node.js APIs
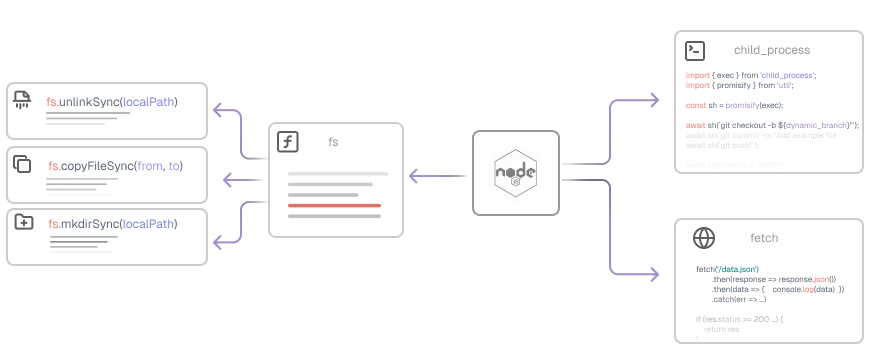
When we talk about scripts, we always rely on following built-in capabilities:
- Access local files – using
fsfor file and folder operations, andpathto build paths correctly - Calling remote APIs – using
fetch - Execute shell scripts - using
child_process/executeorexecuteSyncscript. - Process - get process params, env variables, exit program using
process.argv,process.exit()and so on.
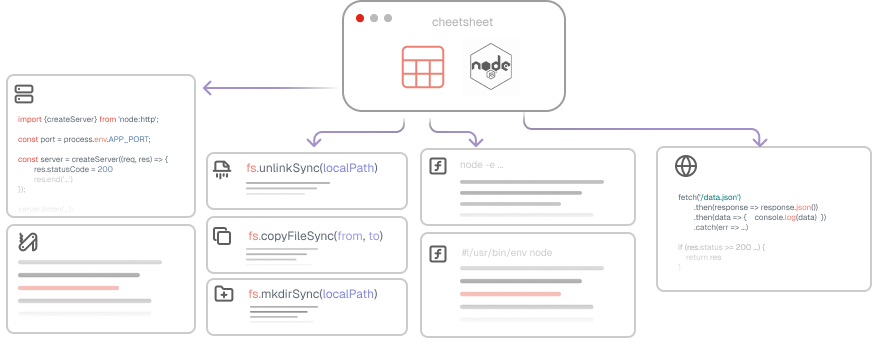
ℹ See the Nodejs Cheatsheet for more info and tips:
Node.js Scripting Cheatsheet (Battle Tested)
File System Access fs
fssync vs promises
sync vs promisesIn Node.js, to modify file system we have fs module.
It has two primary options:
- Promise API (
fs/promises)
import fs from 'fs/promises'

// Read a file without callbacks
await fs.readFile('./example.ts', 'utf-8')- Sync API (
fs.dosmthSync)- pros: Synchronous operation - makes code easy to read/code.
- cons: synchronous api - blocks thread, does not support parallelism.
import fs from 'fs'

fs.readFileSync('./example.ts')
We also have non-sync versions readFile, writeFile, others - that rely on callbacks and can lead to “callback hell.”
Because of this, they're rarely used nowadays; instead, we should use either the promise-based or synchronous API.
Use fs/promises by default, but if you need sync code logic - fs's sync methods.
CRUD with files
CRUD with filesIn all examples we'll import fs with import fs from 'fs' and use the promise-based APIs.
To switch to the synchronous versions, just replace calls to fs.promises.readFile with fs.readFileSync, and do the same for the other methods.
Create/Update file: writeFile
writeFileWrite data into string, override existing content. Also if folder don't exists - it will fail, if file don't exists- it will create it.
// data passed could be a string of buffer
await fs.promises.writeFile('temp.json', '{}')`
Read file: readFile
readFileRead the file into memory, passing the encoding as the second argument so you get a string instead of a raw byte buffer.
await fs.promises.readFile('temp.json', 'utf8')Delete file or directory: rm
rmThe rm command removes both files and directories.
There are also:
unlink, which deletes only filesrmdir, which deletes only directories
Since rm covers both cases, you don't have to choose each time—unless you specifically want to guard against accidentally deleting a folder or file.
await fs.promises.rm('temp.json')You might also want to check out:
- Node.js cheatsheet with all essentials in one place
- Node.js docs for every
fs.promisesmethod: https://nodejs.org/api/fs.html#fspromisesrmpath-options
Fetch fetch
fetchNode.js built-in fetch is similar to browser API, the default method is GET
export const loadData = async () => {
    // GET request
    const res = await fetch('/api/data')
    const result = await res.json()
    return result
}

// POST request
export const sendData = async () => {
    return fetch('/api/data', {
        method: 'POST', // PUT/DELETE etc.
        headers: {'Content-Type': 'application/json'},
        body: JSON.stringify({name: 'Widget', qty: 5})
    })
        .then(res => res.json())
        .then(data => console.log('Created:', data))
        .catch(err => console.error(err))
}
Execute shell scripts
To execute shell scripts or other CLIs in Node.js, we have two main options:
-
execSync()/child_process.exec- spawns a shell in a child process, then returns the output.- When: you've got quick, linear tasks, no extra logic required, output is small.
- Good: simple, quick one-liners
- Bad: less control/info about spawned process, same thread, vulnerable to injection - but could be solved by
execFile().
-
spawnSync()/child_process.spawn- spawns a new process- When:
- detached process required
- when output is too big for memory (stdin/stdout pipes)
- more control over spawned process
- Good: safer, streams I/O directly, structured result, More “advanced” control over the spawned process
- Bad: you'll write extra setup code
- When:
In practice: I used spawn about 10% of the time and exec (or execSync) the other 90%.
But after writing this article - and knowing the difference, I now use it more and more.
Consider starting with the synchronous method, then switching to a promise-based approach as soon as you introduce async behavior.
execSyncvs spawn
execSyncvs spawnTo understand the difference between execSync and spawn - lets implement a script that:
runs yarn audit --json (audit vulnerabilities) if we have vulnerabilities - fail.
By default yarn don't provide such functionality and fail even if you have vulnerabilities lower than critical.
execSyncscript:
import {execSync} from 'child_process'

const raw = execSync('yarn audit --json', {encoding: 'utf-8'})

const vulnerabilities = raw
    .split('\n')
    .filter(Boolean)
    .map(JSON.parse)
    .find(({type}) => type === 'auditSummary')?.data?.vulnerabilities

if (vulnerabilities?.critical > 0) {
    console.error('Found critical vulnerability')
    process.exit(1)
}spawnscript:
import {spawn} from 'child_process'

spawn('yarn', ['audit', '--json']).stdout.on('data', rawLine => {
    if (rawLine) {
        const item = JSON.parse(line)
        if (item?.type === 'auditSummary' && item.data?.vulnerabilities?.critical > 0) {
            console.error('Found critical vulnerability')
            process.exit(1)
        }
    }
})
As you can see, in this case spawn looks cleaner: it exits as soon as we get auditSummary, avoids storing redundant output in memory, and requires less code.
But for other cases when you need the full output, execSync could work better.
Sync vs Promise in child_process
child_processCompared to fs/promises there is no child_process/promises module for that in order to have promises we have to use util.promisify method.
- Promise based
child_process.exec:
import {exec} from 'child_process'
import {promisify} from 'util'

const execAsync = promisify(exec)

// don't forgot to use node 14+ and mjs extension for top level await
// https://nodejs.org/api/esm.html#top-level-await
await execAsync('npm run build', {maxBuffer: 1024 * 500})
await execAsync('find dist -type f -name "*.map" -delete', {maxBuffer: 1024 * 500})- Sync
execSync:
import {execSync} from 'child_process'

execSync('npm run build', {stdio: 'inherit', maxBuffer: 1024 * 500})
execSync('find dist -type f -name "*.map" -delete', {stdio: 'inherit', maxBuffer: 1024 * 500})
stdio: 'inherit'- to see logs for the build, by defaultexecSync- will be "silent".maxBuffer: defaults to 200 KB; increase it to avoid “stdout maxBuffer exceeded” (OOM) errors.
To have top level await - use Node.js v14.8+ and mjs extension.
Process: Arguments and Exit Codes
In Node.js we have global process object - provides information and control over current Node.js process.
The four essentials are:
process.argv– grab what the user passed in on the command lineprocess.env– read config or secrets from your environmentprocess.exit([code])- exit process, also we need to know "exit codes".process.cwd()– know where you ran Node so you can build correct paths
Process process.argv
So when we call our script node ./src/script.mjs - and print process.args, we will get:
process.arv[0]- absolutenodepath - it will be absolute path to your node bin, for example/Users/me/.nvm/versions/node/v20.17.0/bin/node.process.arv[1]- absolute file path - example:/Users/me/project/src/script.mjs.
if add one more parameter: node ./src/script.mjs --example:
process.arv[2]- string:--example
So it read CLI parameters, and for initial two transform to absolut paths.
So usually if we extract params/flags we do like that:
// single flags
const flag = process.argv[2]

// multiple flags
const [, , ...args] = process.argv

// or like that
const args = process.argv.slice(2)

// after that we can do smth like that
const isExample = flag?.includes('example')

if (isExample) {
    // do smth
}
Usually, to parse CLI arguments you'll grab a library like yargs,
commander or Inquirer.js.
For simple scripts, though, you can parse process.argv yourself instead of adding a dependency - unless your project already includes one.
process.env
process.envRead or set environment variables.
const port = process.env.PORT || 3000
// Try to fail early - to give fast feedback if we missed some env variable
const secret =
    process.env.SECRET ??
    (() => {
        throw new Error('Missing SECRET')
    })()
process.exit([code])
process.exit([code])Terminate your script with a status code.
By convention:
0⇒ success ✅1⇒ error 🔴 *(non-zero also error)
if (!config.ok) {
    console.error('Config check failed')
    process.exit(1)
}
process.exit(0)
process.cwd()
process.cwd()Get the current working directory (the folder where you ran node). Usually used combined with path to build a path.
If you run script from package.json, process.cwd() points to your package's root, otherwise the place where you
execute the script - ⚠️ not the place where file located.
import path from 'path'

const nextBuild = path.join(process.cwd(), '.next')
Paths in Node.js
To modify files and directories, we need to construct paths - and for that we have Node.js built-in path module.
To work with urls like in browser api - we have URL module.
Before we dive in, let me recap the types of paths we deal with:
-
Relative (
./,../) -
Absolute (from
/or the drive root). We also have the project/execution root viaprocess.cwd().
That may seem simple enough, so it's not immediately clear why we need the path module.
Why we need path in Node.js + __dirname
path in Node.js + __dirnameLet me explain with an example:
- we have
script.mjsanddata.jsonatsrcfolder:
import fs from 'fs'

console.log(fs.readFileSync('./data.json', 'utf-8'))

// src/data.mjs
// {"data": "1"}
Let's go to our src folder - with cd ./src and execute script:
node script.mjsEverything works, so where is the catch? Let's do the same outside the src, from root for example (cd ../)
node ./src/script.mjsIt will fail with:
Error: ENOENT: no such file or directory, open './data.json'
The reason is that path resolved relatively to execution place, not to actual place of the file.
So it will search for data.json in the root of the project (/project/ + ./data.json = /project/data.json)
Let's fix it:
import fs from 'fs'

const __dirname = new URL('.', import.meta.url).pathname
const pathToData = path.resolve(__dirname, './data.json')

console.log(fs.readFileSync(pathToData, 'utf-8')) // now it works
So as you can see we created __dirname variable that is the absolute directory path where file located (/project/src)
__dirname - is built-in in cjs runtime of Node.js, but not in esm modules, where we get it by doing:
const __dirname = new URL('.', import.meta.url).pathname
// or
import { fileURLToPath } from 'url';
const __dirname = fileURLToPath('.', import.meta.url)
path.resolve() vs. path.join()
path.resolve() vs. path.join()path.join()concatenates paths and normalizes separators. Use for relative pieces.
// 'src/utils.js'
path.join('src', 'utils.js')path.resolve()resolves to an absolute path, working backwards from the rightmost argument.
// '/home/me/project/src/utils.js'
path.resolve('src', 'utils.js')
CLI
CLI overview
When we create multiple scripts, it's much better to combine them under a single entry point — cli.mjs our CLI command-line interface.
So we can easily call them with different params as well as extend modify interface in one place.
At first, when you don't have many requirements, just passing one or two flags handling them via process.argv and if/else works fine.
But once we need:
- Pass more params of different types, for example:
and turn that into
node cli.js update ./src --dryconst params = {command: 'update', dir: 'src', dry: true} - Validate parameters - catch typos or missing required options and show helpful error messages
- Read user input - for interactive prompts
- ...and more
handling all that with native code means a lot of boilerplate and dives into readability hell.
CLI libs
Instead, we can lean on battle-tested CLI toolkits in Node.js:
Yargs - lightweight library to build CLI:
- Rich args & commands API
- Grouped options, validation
- Bash/Zsh completion scripts
import yargs from 'yargs';
import { hideBin } from 'yargs/helpers';

yargs(hideBin(process.argv))
    .command('serve [port]', 'start the server', (yargs) => {...})
    .option('verbose', {
        alias: 'v',
        type: 'boolean',
        description: 'Run with verbose logging'
    })
    .parse()
Even though it's less popular than others, I've kept it in my toolkit for years because it has a great balance between simplicity and useful features 🥇
Commander.js (commander) - lightweight library to build declarative CLI:
- Declarative commands & subcommands
- Option flags & parsing
- Auto-generated help
import {Command} from 'commander'
const program = new Command()

program
   .command('serve [port]')
   .description('start the server')
   .option('-v, --verbose', 'Run with verbose logging')
   .action((port = 3000, options) => {...})
program.parse(process.argv)
Oclif (by Salesforce) framework for building scalable CLIs:
- Project scaffolding & generators
- Plugin system
- Built-in testing helpers
import {Command, Flags} from '@oclif/core'

export default class Serve extends Command {
    static description = 'start the server'
    static args = [{name: 'port', required: false}]
    static flags = {
        verbose: Flags.boolean({char: 'v'})
    }

    async run() {
        const {args, flags} = this.parse(Serve)
        // ...
    }
}
Inquirer.js (@inquirer/prompts) - Collection of interactive prompts for Node CLIs:
- Multiple prompt types (input, list, confirm)
- Validation & filters
- Async support
import {prompt} from '@inquirer/prompts'

const answers = await prompt([
    {
        type: 'number',
        name: 'port',
        message: 'Port to serve on',
        initial: 3000
    },
    {
        type: 'confirm',
        name: 'verbose',
        message: 'Run with verbose logging?',
        initial: false
    }
])
const {port, verbose} = answers
// ...
CLI Summary
Each library from this list:
- gives you parameter parsing, validation, and interactive prompts out of the box, so your scripts stay fast, clear, and maintainable.
- well maintained, so you won't go wrong choosing any of them.
For me, it's always been Yargs (or minimist which is part of zx we will cover it later in this article),
but choosing another is also a great choice.
If we only need to parse CLI params, we could use minimist.
import minimist from 'minimist'
const argv = minimist(process.argv.slice(2));
Node.js scripts on steroids - zx
We could spend ages creating our toolkits in Node.js ecosystem - not realizing that zx
already solved all our problems and bundled one of the best libraries - under one roof.
zx(by Google) - tool for writing better scripts.
In this article we previously mentioned some small portion of problems with Node.js for scripting, but the best part of
zx - it solved all of them and even more:
-
No
__dirnameinmjs-zxexport it for you:import {__dirname} from 'zx' -
File system
fs: has some method missing, as well as some existing has some DX issues -zxhasfs-extrabundled:import {fs} from 'zx' fs.copy('file.txt', './src/file.txt')
And the list goes on: once you start using it, you find yourself uncomfortable writing scripts without it. It's like steroids¹ that give you more power - but, unlike steroids, it doesn't take anything from you.
zx Setup
zx SetupLets add zx:
npm install -g zxor we can add it in many other ways, we can skip adding zx as dependency and do it
via npx helper:
npx zx script.mjsWe can also call remote scripts with zx (similar to
curl -o- ... | bash):
zx https://example.com/script.js # Note: works only with `https`Execute zx with Shebang
zx with ShebangTo execute zx scripts we can do it with Shebang:
#!/usr/bin/env zx

const port = argv.p || argv.port || await question('port')

const out  = await $`lsof -t -i tcp:${port}`

await Promise.all(
    out.stdout
        .trim()
        .split('\n')
        .filter(Boolean)
        .map(pid => kill(pid, 'SIGKILL'))
)
Think of it as a regular #!/usr/bin/env node shebang but with zx exports as globals.
Use zx as regular Node.js dependency
zx as regular Node.js dependencyOr we can add zx as regular dependency (npm add zx -D) to the project and use as usual dependency:
import {argv, $, question} from 'zx'

const port = argv.p || argv.port || (await question('port: '))

const out = await $({nothrow: true})`lsof -t -i tcp:${port}`

await Promise.all(
    out.stdout
        .trim()
        .split('\n')
        .filter(Boolean)
        .map(pid => process.kill(Number(pid), 'SIGKILL'))
)
and execute with node ./script.mjs
zx Cheatsheet
zx Cheatsheet$/$.sync Command execution
$/$.sync Command executionAs with fs there are two available API:
- Promise based -
$,await \echo 1`` *(preferable) - Sync API -
$.sync
const list = await $`ls -la`
const dir = $.sync`pwd`
When we execute command, we also have possibility to call it like that: $({ ...<options>}), with following options:
Has following capabilities: - Promise/Sync API: - $ - promise based execution
signal(AbortController) - to cancel execution if neededtimeout(Time, example:1s) - autokill process after specified timeout (example:1s)nothrow(boolean) - skip errorsinput(Buffer|String) - passes the specifiedstdinto the command.
Example:
const controller = new AbortController()

// 2. Auto‑abort after 1second
setTimeout(() => controller.abort(), 1000)

// 3. Run a simple grep, with all four options:
const result = await $({
    signal: controller.signal, // ✂️ can cancel mid‑run
    timeout: '2s', // ⏱ auto‑kill after 2 seconds
    nothrow: true, // 🚫 don't throw on non‑zero exit
    input: 'hello world\nfoo\n' // pass this as stdin
})`grep hello`
Other Methods
All the methods listed here: https://google.github.io/zx/api But lest review main one quickly:
-
question()shortcut on top of readlineconst port = await question('Insert port? ') // could be conditional const token = process.env.TOKEN ?? (await question('Insert token: ')) -
spinner:await spinner(() => $`long-running command`) -
glob- global search, withglobbypackage under the hood.const sourceMaps = await glob(['dist/*/**.js.map', '!dist/index.js.map']) -
minimist: for arguments parseconst argv = minimist(process.argv.slice(2), {})
As well as well known libs like : dotenv for env variables and chalk for styling/coloring in terminal,
as well as others, for the full list check official documentation
zx Summary
zx SummaryIn short, zx transforms Node.js scripting and supercharges it. For me, scripting clearly falls into a "before‑zx" era and an "after‑zx" era.
It has had an even bigger impact on my workflow than the LLMs I use heavily.
zx is exceptionally well designed to solve your scripting problems in Node.js. If you're weighing the downsides, here's the main one:
- It brings in a lot of sub‑dependencies, which can bloat your
node_modules. - (If that's a deal‑breaker, check out
zx@lite, which trims things down.)
If you haven't tried zx yet, give it a go. And if you're already using an LLM to generate scripts, ask it to use zx.
You'll find the output far more readable and maintainable.
AI Scripting Toolkit
We could cover everything with scripts, but at what cost? Tasks like:
- modifying code files with project context
- extracting data from messy text
- running natural‑language queries
- and more are almost impossible to implement without LLMs.
That's why LLMs are now part of our Node.js scripting toolkit.
Most of the time we work in LLM apps - like ChatGPT, Claude, Gemini etc. For code changes we go to IDEs (Cursor, Windsurf, Junie in Intellij)
When we talk about Node.js scripting, we have 2 main options:
-
CLIusage - directly or by invoking in scripts, but in most cases (almost 99%) it's interactive mode where you do the work in context by accepting or declining suggestions. -
AI SDK- that can be used by our scripts programmatically.
AI CLI comparison
Here's a quick look at the 3 leading CLIs:
-
- Pricing: $3 per 1 million input tokens, $15 per 1 million output tokens.
- 📈Most popular based on npm downloads (
3.7M/weekly), also historically the first to introduce a CLI. - Pros: Deep code understanding, project context, iterative editing, MCP support.
- Cons: Anthropic-only, requires API key setup (can't be used without paying)
npm install -g @anthropic-ai/claude-code

# Interactive mode
claude-
- Pricing: Free tier available, $0.50 per 1M input tokens, $1.50 per 1M output tokens for Gemini. (Cheapest)
- Pros: Best pricing, for some type of tasks perform same or better - with lower price/faster
- Cons: Newer ecosystem, fewer integrations than OpenAI/Anthropic, require more context/details to perform well
npm install -g @google/generative-ai-cli

# Interactive mode
gemini-
- Pricing: $2 per 1M input tokens, $4 per 1M output tokens (most expensive)
- Pros: Best performer, good quality of work
- Cons: less autonomous (lots of approvals), newer tool with evolving features
npm i -g @openai/codex

# Interactive mode
codex
AI CLI Summary
Claude offers the best CLI capabilities, with more features overall and greater autonomy compared to Codex CLI.
However, when it comes to code quality, I've found OpenAI's results stronger at implementing changes—although
there were times when Claude 3.7 took the lead.
Gemini also deserves a spot in my top three, thanks to its speed and cheap pricing. At the moment I would suggest
to use only for cost optimization - when a task is already solved by GPT or Claude and you just need to cut expenses.
In short:
- if you want to start for free and cheaply, try
Gemini. - If you want more features and solid output, use
Claude. - And if you already have
ChatGPTand need the very best results, stick withChatGPT. Although it change rapidly nowadays.
There's also GitHub Copilot - which has a CLI but is mostly used inside IDEs rather than as a standalone CLI (limited to certain use cases). It supports all major IDEs and IMHO it's one of the top contributors to productivity improvements nowadays.
AI SDK for scripting
When you're building scripts that need AI capabilities, the SDK approach gives you more control and flexibility. You can integrate AI directly into your automation workflows, batch process files, or build custom tools that fit your exact needs. The CLI tools are great for interactive work, but SDKs are where the real power lies for scripting.
For that we have @ai-sdk/openai by Vercel:
- Pros: Provider-agnostic, streaming support, tool calling
import {openai} from '@ai-sdk/openai'
import {generateText} from 'ai'

const {text} = await generateText({
    model: openai('gpt-4'),
    prompt: 'Extract all email addresses from this text: ' + messyData
})

console.log(text)
I think of this as a good ORM - you can easily switch databases, in this case LLM providers.
There also others like:
- OpenAI sdk (
openai) - Google Generative AI SDK (
@google/generative-ai)
Both have nice performance and feature sets, but the point is that having multiple LLM providers with the same API is a killer feature.
Example scripts - Practice
We previously crafted our "dream team" toolkit with zx and AI SDK.
Let's do some practice and show how powerful this combo is.
We will implement 2 scenarios:
- Generate commit message based on changed files
- Generate unit tests for file/function
Generate Unit Test
Problem statement: we want to generate unit tests (with jest) for our functions/files
For that we need:
- Get the target file and read its contents:
import {fs, argv} from 'zx'

const file = argv._[0] || argv.file
const code = await fs.readFile(file, 'utf8')
const output = file.replace(/\.(js|ts|jsx|tsx)$/, '.test.$1')- Generate test file content using AI with a focused prompt:
import {openai} from '@ai-sdk/openai'
import {generateText, spinner} from 'ai'
// ...
const {text} = await spinner('Generating tests...', () =>
    generateText({
        model: openai('gpt-4'),
        prompt:
            `Generate ONLY the unit test file content for this code using jest.` +
            `Return only the test code, no explanations, no markdown, no extra text:\n\n<code>${code}</code><file>${file}</file>`,
        maxTokens: 2000
    })
)- Show the generated tests and ask for confirmation before saving:
const saveConfirm = await question(`Review changes above, should we save it to ${output}? (y/N) `)
if (!saveConfirm.toLowerCase().startsWith('y')) {
    console.log('Declined to save')
    process.exit(0)
}

await fs.writeFile(output, text)
And that's it, let's see the full code:
import {fs, argv, question, spinner} from 'zx'
import {generateText} from 'ai'
import {openai} from '@ai-sdk/openai'

const file = argv._[0] || argv.file
const code = await fs.readFile(file, 'utf8')
const output = file.replace(/\.(js|ts|jsx|tsx)$/, '.test.$1')

const {text} = await spinner('Generating tests...', () =>
    generateText({
        model: openai('gpt-4'),
        prompt:
            `Generate ONLY the unit test file content for this code using jest.` +
            `Return only the test code, no explanations, no markdown, no extra text:\n\n<code>${code}</code><file>${file}</file>`,
        maxTokens: 2000
    })
)

console.log(`Changes are:${text}`)

const saveConfirm = await question(`Review changes above, should we save it to ${output}? (y/N) `)
if (!saveConfirm.toLowerCase().startsWith('y')) {
    console.log('Declined to save')
    process.exit(0)
}

await fs.writeFile(output, text)
This demonstrates just how easy it is to add such functionality nowadays, with not much code needed.
Commit message generation
Let's start with a quick problem statement: we have files changed and we need a help to write meanful commit message.
For that we need:
- Get changed files and branch
import {$} from 'zx'

const changed = await $`git diff --name-only`.quiet()
const branch = await $`git branch --show-current`.quiet()- Get the list of changed files and the current branch name:
import {openai} from '@ai-sdk/openai'
import {generateText} from 'ai'
// ...
const prompt = `Write a clear and conventional commit message for these files:\n<changes>${changed}</changes>,
add prefix as  ticket number from the branch if needed <branch>${branch}</branch>`

const {text} = await generateText({
    model: openai('gpt-4o-mini'),
    prompt
})- Ask the user whether to proceed with the commit or not:
const answer = await question('Do you want to commit with this message? (y/N) ')

if (answer.trim().toLowerCase() === 'y') {
    await $`git commit -m ${text}`
    console.log('✅ Commit created.')
} else {
    console.log('❌ Commit cancelled.')
}
And that it, lets see full code:
import {$, question} from 'zx'
import {openai} from '@ai-sdk/openai'
import {generateText} from 'ai'

const changed = await $`git diff --name-only`.quiet()
const branch = await $`git branch --show-current`.quiet()

if (!changed) {
    console.log('No changes detected.')
    process.exit(0)
}

const prompt = `Write a clear and conventional commit message for these files:\n<changes>${changed}</changes>,
add prefix as  ticket number from the branch if needed <branch>${branch}</branch>`

const {text} = await generateText({
    model: openai('gpt-4o-mini'),
    prompt
})

console.log('\nSuggested commit message:\n')
console.log(text)

const answer = await question('Do you want to commit with this message? (y/N) ')

if (answer.trim().toLowerCase() !== 'y') {
    console.log('❌ Commit cancelled.')
    process.exit(0)
}

await $`git commit -m ${text}`
Although this code snippet works well, in a real-life scenario we would like to use the actual content of the diff
(diff) rather than just relying on file name changes (diff --name-only) and branch information to generate more
meaningful commit messages. However, this will require a few extra logic steps to handle large diffs.
Distribution of Scripts
Sharing scripts is easy when they're project-specific — just commit them to your repo. But what if a script is personal, used across projects, or meant to be global or even a library? In that case, committing might not be the best option. Let's find out how to share scripts more effectively.
Inline Script node -e
node -eCopy/Paste script will work most of the time, but it require a lot of steps - copy, create file, paste the code,
execute with node script.mjs.
import {execSync} from 'child_process'

const pid = execSync(`lsof -t -i:${process.argv[2]}`).toString().trim()
execSync(`kill -9 ${pid}`)
node kill-port.mjs 3000how we can improve it is to inline a script:
node --input-type=module -e "
  import {execSync} from 'child_process'
  execSync('kill -9 ' + execSync('lsof -t -i:3000').toString().trim())
" 3000
By default Node.js has cjs modules, we previously used mjs for esm modules and imports, with inline scripts we need
--input-type=module, otherwise we will need to use require instead.
So now we can paste directly in terminal and execute, we can even set it to terminal profile (.bash_profile, .zshrc other)
alias and if needed executre it:
killport() {
  node --input-type=module -e "
    import { execSync } from 'child_process';
    const pid = execSync('lsof -t -i:$1').toString().trim();
    if (pid) execSync('kill -9 ' + pid);
  " "$1"
}
The main drawbacks of this approach are:
- You have to escape curly braces and
${}expressions. - Copy-pasting is clearly limited — treat it as a quick, temporary solution rather than something permanent.
Execute remote script
We could host our script on web server, so that it could be accessed (example.com/script.mjs)
We could do it with hosting it on the server but it should be always up etc, which could be disadvantage.
Or we can do it with github gist, for that we need to:
- create a public gist
- click a
rawbutton - which will open your raw script, now you can copy the URL and use it, for example:https://gist.githubusercontent.com/.../animate.mjs(inital gist)
After that we could execute our remote script:
- With
node+curl(curl -s <URL> | node):
# if no esm modules required we could have just `node`
curl -s https://gist.githubusercontent.com/ra2dev/b57bcde5365e1af1345617ecc2549e82/raw/305060cfdecec20a5b463da57d1b216865f3a061/animate.mjs | node --input-type=module --trace-warnings- with
zx:zx <URL>:
zx https://gist.githubusercontent.com/ra2dev/b57bcde5365e1af1345617ecc2549e82/raw/305060cfdecec20a5b463da57d1b216865f3a061/animate.mjsThis approach is similar to bash | curl -fsSL https://example.com/install.sh and offers the same benefits:
- Fast: One-liner, easy to copy-paste
- No temp files: Runs directly from the web
- Centralized: Easy to update in one place
Downsides: Security risks, script/server might be unavailable or deleted — hard to recover or debug.
NPM/npx
Another way to share scripts is to package them as npm modules. Instead of hosting your script on a server or gist, you publish it to the npm registry. Then anyone can run it via npx (or install it globally if needed).
Here is a nice article how to do it: https://www.totaltypescript.com/how-to-create-an-npm-package
Quick example
Let's say you create a CLI tool called my-script that lives in bin/index.js.
Your package.json needs:
{
    "name": "my-script",
    "version": "1.0.0",
    "bin": {
        "my-script": "bin/index.js"
    }
}
Now you can publish: npm publish
And then run it from anywhere, since npx will work without even having a dependency in package.json:
npx my-scriptAlso if you will add your publish library to the project dependencies, you can also use it: yarn my-script
Pros of npx/npm for scripting are:
- No server needed – npm handles distribution
- Versioning & docs – built-in via the npm registry
- Works with dependencies – can bundle or import any npm package
- Stable - it not possible to delete old releases *(unless vulnerability patches) - so compared to external scripts - booletprofed approach.
Downsides:
- More setup – you need a package.json, an npm account, and a unique name for your package
- Not ideal for quick one-offs – overkill for scripts meant to be used once or shared rarely
- Publish step required – every change needs a version bump and a new publish
So if your script is meant to be used long-term, by multiple people or teams, or across several repos - choosing the
npm/npx approach is the best option and will benefit you in long run.
Raycast
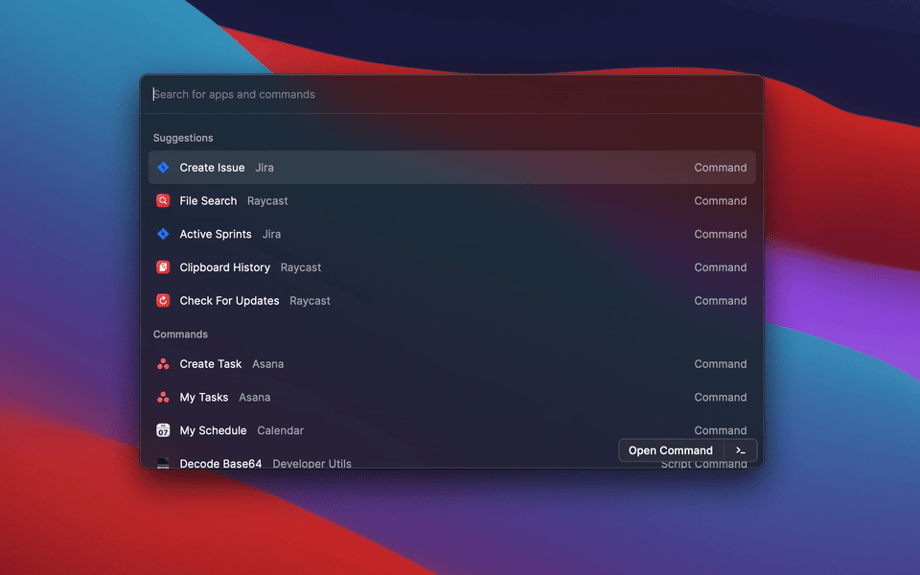
So far, everything we've covered was terminal-based — but sometimes a good GUI just fits better.
For that, I don't really have a comparison — Raycast is easily the best when it comes to Node.js scripts,
with great support for JavaScript/TypeScript and custom scripts.
To add your script in Raycast - we have two main options:
-
Script command (in Bash, Node.js other) could be created directly from Raycast, it will create a local script file and link to it, we could even assign a hotkey.
- Works great for small scripts, one file, no dependencies needed, no input params.
-
Raycast extension - full feature interface inside Raycast
- Run internal dev scripts
- Query APIs or services with fast UI
- Could be published to git and share with the team
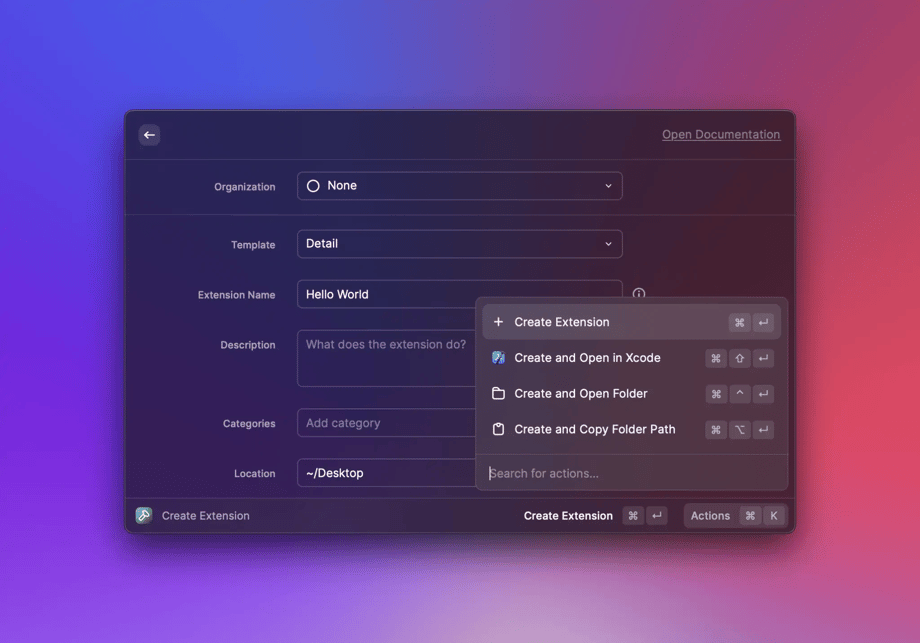
In my experience, I mostly use extensions. Scripts are a bit limited — basic needs can be covered with simple scripts, but once you want to put something into a GUI, you usually need more than just a single script.
What I've found is: once you've created a script and used it across your projects for a while, the next step is often turning it into a Raycast extension. That move works extremely well — it boosts not just your own productivity, but your team's too.
At the moment Raycast don't support a Windows, but it currently in beta, so hopefully will be released soon.
Summary and Conclusion
Scripting isn’t just this manual grind anymore — it’s kind of turned into an AI-powered super skill. Between modern Node.js, the zx library, and tossing a bit of AI into the mix, it honestly feels like developer steroids: you get all the extra speed and productivity without any of the side effects. That said, you still can’t just hand the whole thing off to AI or agents. But the cool part is, a lot of stuff that used to need heavy ML setups is now just a simple LLM call. Total game-changer for productivity.
Key Takeaways
- Start Simple, Scale Smart: Begin with basic Node.js scripts, then layer in zx and AI as complexity grows
- Embrace the Modern Stack: ESM modules, TypeScript when needed, and promise-based APIs create cleaner, more maintainable code
ZXis a Force Multiplier: This single library eliminates most Node.js scripting friction and should be your default choice- AI is Now Essential: LLMs aren't just helpful — they're necessary for tasks involving natural language, code analysis, and complex text processing
- Distribution Matters: Choose the right sharing method based on scope — inline for quick fixes, npm for reusable tools, Raycast for team productivity
In the end, scripting isn't just about saving time — it's about reclaiming your focus for the work that actually matters. Automate the boring stuff, streamline the painful parts, and make space for the things you love building. With the right tools, scripting stops feeling like a chore — and starts feeling like a creative superpower.